Christmas gift wrapping frenzy hit, and you’re down to the wire with a few adorable small gifts like gift cards or cash? Envelopes feel too impersonal, right? Don’t worry! Dust off your Cricut Maker and let’s whip up some charming Small Gift Bags using supplies you probably already have. No extra trips to the store needed!
These delightful little bags, sized around 4″ x 4.5″ x 1″, are perfectly sized for those special little somethings. They are incredibly quick to make and add a personal touch that store-bought bags just can’t match.
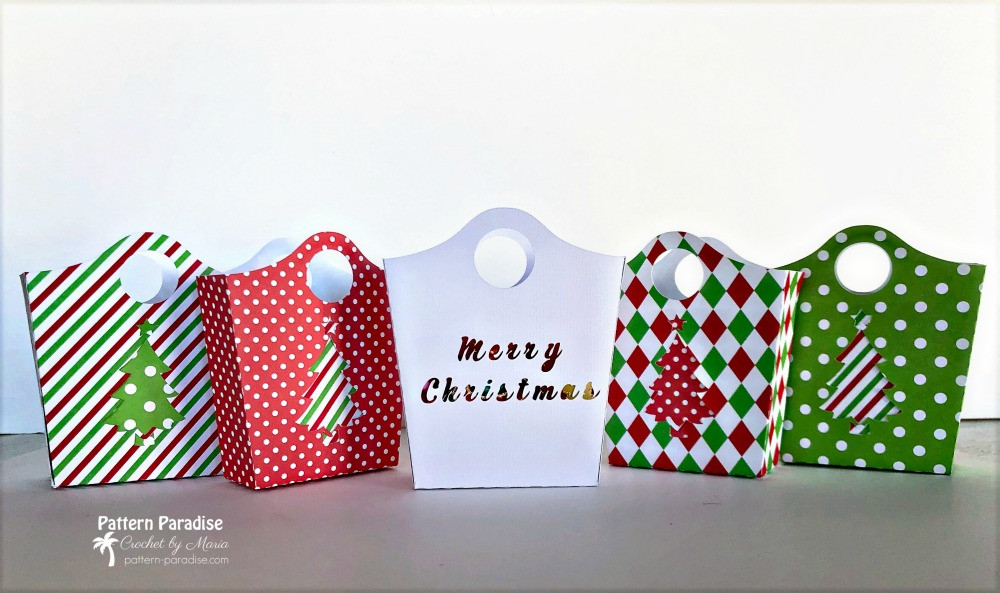
 Variety of charming small gift bags crafted with Cricut, showcasing DIY gift wrapping ideas.
Here’s a simple guide to create your own:
Crafting Your Custom Gift Bags: Step-by-Step
-
Design Time in Cricut Design Space: Start by opening Cricut Design Space. For the bag shape, head over to Bird Cards, a fantastic resource for templates. Download their bag template file – it includes several options! Choose a template you like and import it into Design Space. Get creative by adding embellishments! In my example, I used a festive tree image from Cricut’s library and personalized text using a Cricut font.
-
Prepare to Cut: Once you’re happy with your design and sizing, use the “attach” function in Design Space to group all elements. This ensures everything cuts out together as one piece. Place your chosen cardstock on your Cricut cutting mat and load it into your machine. Now, send your design to cut! After cutting, carefully peel the design from the mat.
-
Assemble Your Adorable Bags: If you included cutouts in your design, like the tree and text in my example, now’s the time to add a pop of color! Take small paper scraps and tape them behind the cutouts on the inside of the bag. Next, fold along the score lines of your cut template. Assemble the bag shape and secure the sides and bottom using tape (double-sided tape works great) or glue. And just like that – you have a collection of super cute small gift bags ready to go!
 Close-up view of a handmade small gift bag with a Christmas tree design, created using Cricut and cardstock.
Make It Even Easier with My Template
Want to skip the design step altogether? I’ve got you covered! Use my ready-made project template for a Christmas Tree Treat Bag. Simply click “Make It,” and you’re all set to start cutting and assembling your bags right away.
Spread the Handmade Joy!
Creating these small gift bags is not only fast and simple, but it’s also a fun way to personalize your gifts. I hope you enjoy making these as much as I did!
I’d love to see your finished small gift bag creations! Share them on my Facebook page.
Stay Connected!
For more crafty inspiration, free patterns, and fun giveaways, sign up for my newsletter!