Adding a personal touch to a jewelry gift elevates it from a simple present to a cherished keepsake. While beautiful jewelry speaks for itself, presenting it in a thoughtfully crafted box enhances the entire gifting experience. This guide will walk you through creating your own stunning flower tab paper gift box, perfect for showcasing your precious jewelry gifts for birthdays, anniversaries, or any special occasion. And the best part? We’re providing a FREE printable template to make this project easy and enjoyable!
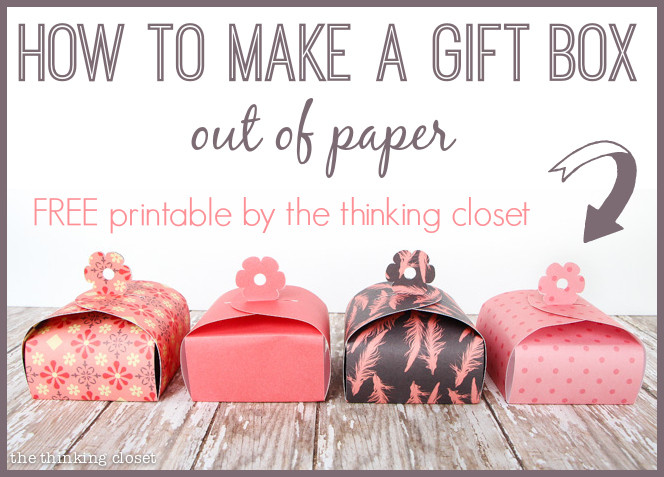 Handmade flower tab paper jewelry gift box, adding a personal touch to any jewelry gift.
Why a DIY Jewelry Gift Box?
In a world of mass-produced items, a handmade gift box stands out. It tells the recipient that you’ve invested time and effort, not just money, into their gift. A DIY Jewelry Gift Box is more than just packaging; it’s an extension of your thoughtfulness.
Imagine receiving a delicate necklace nestled inside a generic cardboard box versus a beautifully crafted paper box with intricate flower tabs. The latter instantly feels more special and considered. This is the magic of handmade – it adds a layer of emotional value that store-bought options simply can’t replicate.
Furthermore, creating your own jewelry gift boxes allows for complete customization. You can choose paper that complements the jewelry inside, match a party theme, or simply reflect the recipient’s personality. The possibilities are endless, and the result is always unique.
Materials You’ll Need to Create Your Jewelry Gift Box
Before we dive into the tutorial, gather these simple materials:
- Printable Template: Download our FREE flower tab paper gift box template (available at the end of this guide).
- Paper: Choose decorative scrapbook paper or cardstock. Heavier paper (65lb or more) is recommended for durability and a more professional look. Double-sided paper adds an extra touch of elegance.
- Scissors or Craft Knife: For precise cutting. A craft knife and cutting mat are ideal for intricate details but scissors will work too.
- Scoring Tool (Optional): A bone folder or even a dried-up ballpoint pen can help create crisp, clean folds.
- Adhesive: Double-sided tape or glue dots work best for a seamless finish.
- Printer: To print the template.
- Ruler: For accuracy when folding.
Step-by-Step Guide to Assembling Your Flower Tab Jewelry Gift Box
Let’s get crafting! Follow these easy steps to create your own charming jewelry gift box:
Step 1: Download and Cut Out the Template
First, access our free downloadable template for the flower tab paper gift box. Once downloaded, print the template onto your chosen paper. For a sturdier box, we recommend using cardstock.
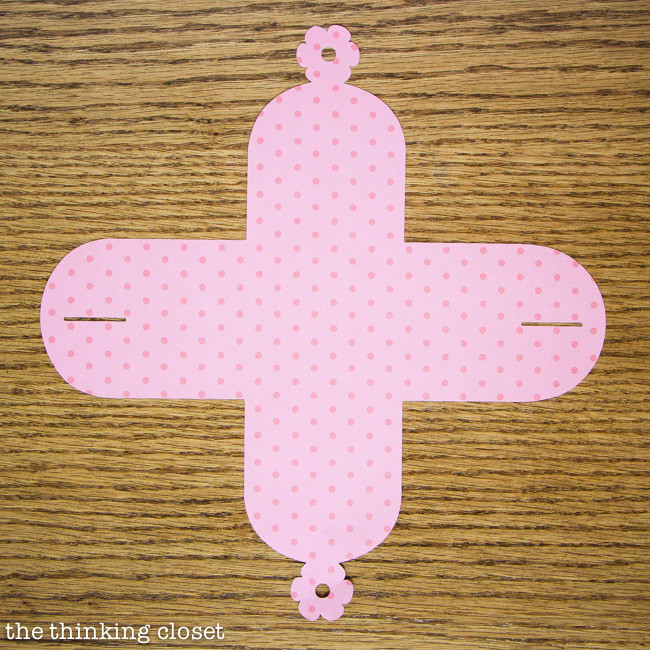 Flower tab gift box template printed on decorative paper, ready for cutting. FREE template available for download.
Carefully cut out the template along the solid lines using scissors or a craft knife. For intricate curves of the flower tabs, a craft knife will offer more precision. Take your time to ensure clean, accurate cuts – this will make the folding and assembly process much smoother.
Step 2: Score and Fold the Edges
Using a ruler and a scoring tool (or a bone folder), score along all the dotted lines of the template. Scoring creates pre-fold lines, making it easier to achieve crisp and even folds. If you don’t have a scoring tool, you can gently use a dried-up ballpoint pen and ruler.
 Folding up the four bottom edges of the paper gift box, aligning folds with cut edge.
Once scored, fold along all the scored lines. Begin by folding upwards the four bottom edges of the box, aligning the folds precisely with the cut edges to avoid any gaps. Crease each fold firmly for a professional finish.
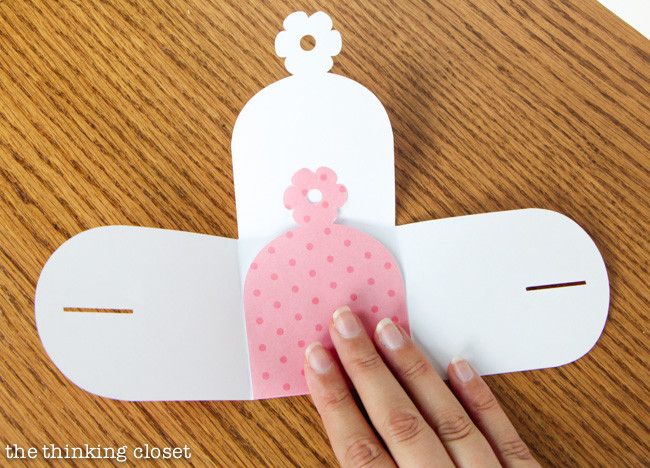
Step 3: Shape the Walls of Your Jewelry Box
Gently curl the four walls of the box inwards. Work with two opposite walls simultaneously, using your hands to encourage the paper to curve and tuck inwards. This step helps the box take its curved form and makes the flower tabs easier to close.
 Curling in the four walls of the paper gift box to create its curved shape.
If you are using thinner paper, you might find it helpful to fold the edges on the flower tab sides about halfway up to add extra structure. However, this step is generally not necessary for heavier cardstock.
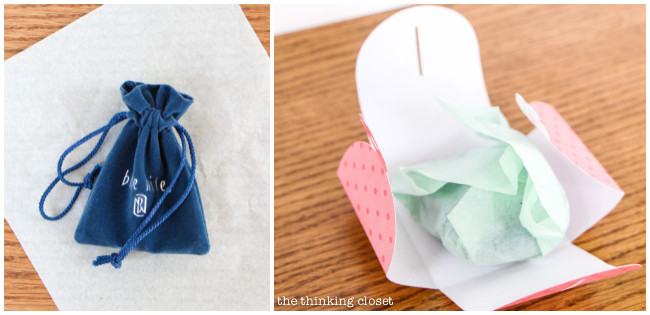
Step 4: Place Your Jewelry Gift Inside
Now it’s time to place your carefully chosen jewelry gift inside the box! Consider wrapping delicate jewelry in tissue paper or placing it in a small jewelry pouch for extra protection and presentation. Confetti-style stuffing or shredded paper can also add a festive touch.
Curling in the four walls of the paper gift box to create its curved shape.
Center the jewelry within the box to ensure it sits nicely and is showcased beautifully when the box is opened.
Step 5: Close and Secure Your Flower Tab Jewelry Gift Box
The final step is to close your charming flower tab jewelry gift box. Bring the flower tabs together so they meet in the center. Then, carefully slide one slit at a time over the corresponding flower tab to seal the box.
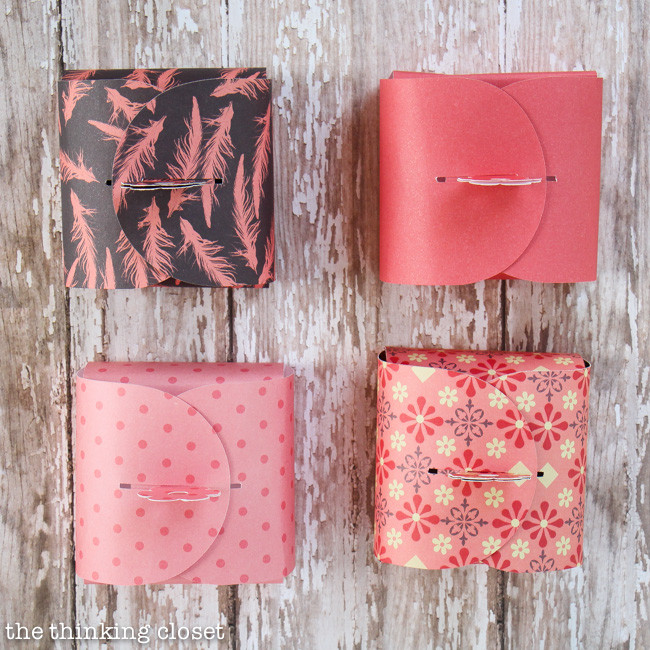 Closing the flower tab paper gift box by sliding slits over flower tabs to seal it.
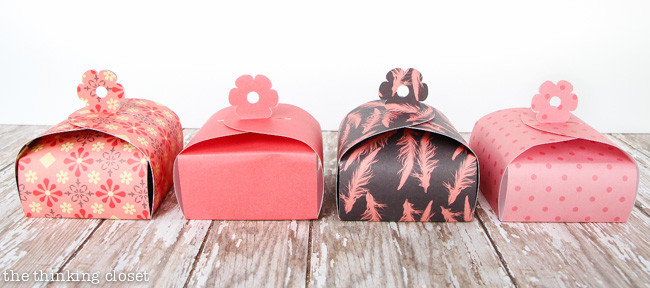 Finished flower tab paper jewelry gift box, ready to be gifted.
Voila! Your handmade flower tab paper jewelry gift box is complete and ready to impress. For an extra touch, you can tie a ribbon or tag through the center of the flower tabs to personalize it further or indicate who the gift is for.
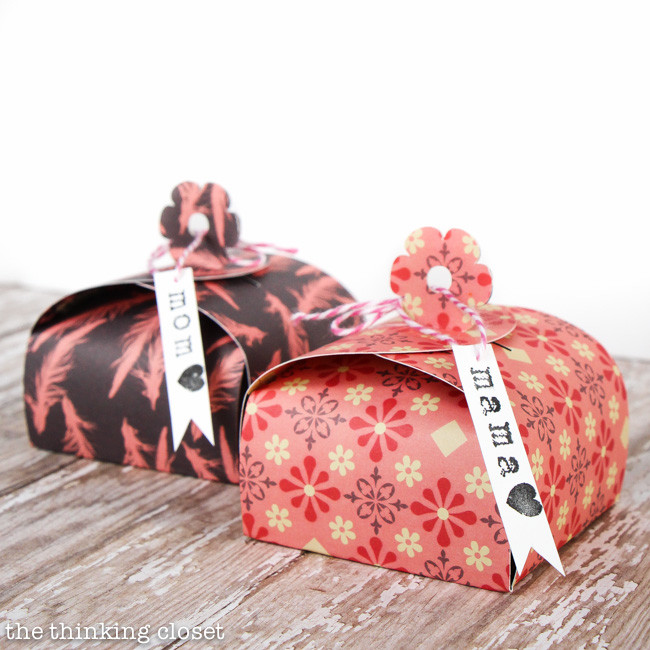 Flower tab paper gift boxes with tags tied through the center of the flower, adding personalization.
Customization Ideas for Your Jewelry Gift Box
While the flower tab design is beautiful on its own, here are a few ideas to personalize your jewelry gift boxes further:
- Paper Choice: Experiment with different paper patterns, colors, and textures to match the jewelry or the occasion. Metallic paper, glitter paper, or paper with subtle patterns can all create different effects.
- Embellishments: Add small embellishments like ribbons, beads, charms, or stickers to the flower tabs or the box itself.
- Tags: Create custom tags with the recipient’s name, a special message, or the date.
- Stamps or Calligraphy: Use rubber stamps or calligraphy pens to add decorative elements or personalize the box with initials or designs.
- Color Coordination: Match the paper and embellishments to the colors of the jewelry inside for a cohesive and thoughtful presentation.
Download Your FREE Jewelry Gift Box Template
Ready to start crafting? Download your FREE flower tab paper jewelry gift box template now and begin creating beautiful, personalized packaging for your precious jewelry gifts! Click the link below to access your template and unlock a world of creative gift-giving possibilities.
[Download the FREE Flower Tab Jewelry Gift Box Template Here]
By crafting your own jewelry gift box, you’re not just presenting jewelry; you’re giving a piece of your heart and creativity. Enjoy the process and the delighted smiles of your recipients!