
Do you need a creative way to present a gift to a lawyer? Learning How To Fold Paper Into A Gift Bag offers a personalized touch, especially for those unique, oddly-shaped presents. At lawyergift.com, we understand the importance of presentation, so we will provide an exceptional gifting experience that shows off your thoughtful and unique gift ideas.
1. Why Learn How to Fold Paper Into a Gift Bag?
Learning how to fold paper into a gift bag provides a custom solution for presenting gifts, especially those with odd shapes, and adds a personal touch to gifting, making your present even more special.
1.1. Adds a Personal Touch
Creating a gift bag from paper shows you put thought and effort into the presentation, making the gift more meaningful. Adding a handmade touch can make your gift stand out, showing the recipient you care about the details.
1.2. Cost-Effective
Making your own gift bag can save money, especially if you have wrapping paper or decorative paper on hand. Instead of buying a generic gift bag, you can make one using materials you already have, saving money and being resourceful.
1.3. Customization
Folding your own gift bag lets you customize the size, shape, and design to fit the gift perfectly. You can choose paper that matches the occasion or the recipient’s taste, adding a special touch.
1.4. Environmentally Friendly
Using paper to create gift bags can be more eco-friendly than buying plastic or non-recyclable options. You can use recycled paper or wrapping paper, reducing waste and promoting sustainability.
1.5. Adaptable for Odd Shapes
Homemade gift bags are perfect for oddly shaped items that don’t fit well in standard bags. You can adjust the dimensions of the bag to accommodate any unique shape, making it a practical solution for unconventional gifts.
1.6. Quick and Convenient
Once you learn the basic folding techniques, creating a gift bag is quick and easy, ideal for last-minute gifts. You can make a customized gift bag in minutes, saving time and ensuring your gift looks great.
2. What Materials Do You Need to Fold a Paper Gift Bag?
To fold a paper gift bag, you will need wrapping paper, scissors, tape, a ruler, a pencil, hole punch, and ribbon to complete your beautiful and personalized gift bag.
- Wrapping Paper: Choose a design that suits the occasion and the recipient’s taste.
- Scissors: For cutting the paper to the correct size.
- Tape: To secure the folds and edges of the bag.
- Ruler: Helps measure and create straight folds.
- Pencil: For marking measurements and guidelines.
- Hole Punch: To create holes for the ribbon handles.
- Ribbon: To use as handles for the gift bag.
These materials are essential for creating a professional-looking and functional paper gift bag.
3. How Do You Prepare the Paper for Folding Into a Gift Bag?
To prepare the paper for folding into a gift bag, start by selecting a large sheet of decorative paper, such as wrapping paper or kraft paper, and cutting it to the desired size, considering the dimensions of the gift.
3.1. Select the Right Paper
Choose decorative paper like wrapping paper or kraft paper for your gift bag, so it is sturdy enough to hold the gift without tearing. Select a design that matches the occasion or the recipient’s taste.
3.2. Measure and Cut
Lay the paper on a flat surface and measure the dimensions needed for the gift bag. Use a ruler and pencil to mark the cutting lines, ensuring you leave enough paper to form the bottom and top of the bag.
3.3. Crease the Edges
Fold the paper along the marked lines to create crisp creases, so the bag maintains its shape and structure. Use the edge of a ruler or a bone folder to make sharp, clean folds.
3.4. Reinforce with Tape
Apply tape along the inside of the folds to secure them, making the bag sturdy. Use clear tape or double-sided tape for a seamless look.
3.5. Check for Symmetry
Ensure the paper is symmetrical and the folds are even, resulting in a professional-looking gift bag. Make any necessary adjustments before proceeding with the final assembly.
By following these steps, you can prepare the paper properly for folding into a gift bag, ensuring it looks attractive and functions well.
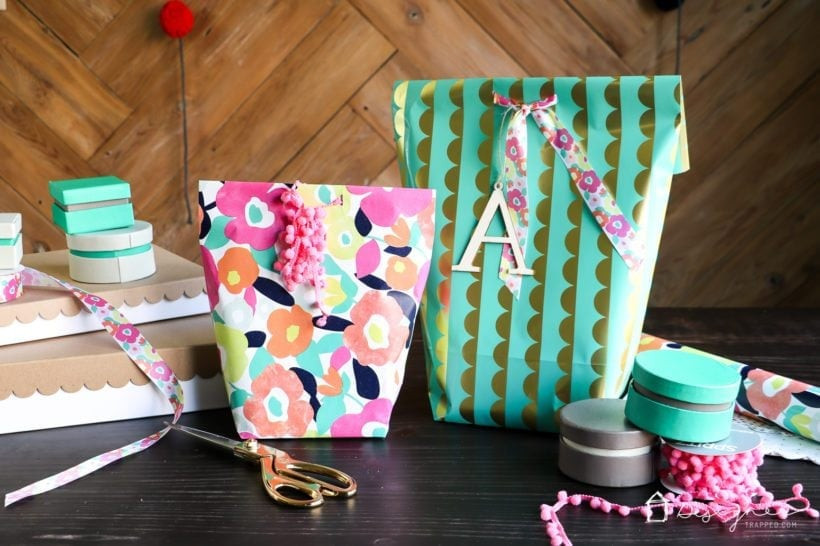 DIY gift bag from wrapping paper by Tasha Agruso of Kaleidoscope Living
4. What Are the Basic Folds to Create the Gift Bag Shape?
The basic folds to create the gift bag shape involve folding the paper vertically to form a tube, creating a base by folding and unfolding the bottom, and shaping the sides by pressing the folded edges inward.
4.1. Vertical Fold
Fold the paper in half vertically, bringing the two long edges together to form a tube. Make sure the edges are aligned, and crease the fold sharply.
4.2. Secure the Seam
Use tape or glue to secure the vertical seam, creating a closed tube. Ensure the seam is strong to prevent the bag from falling apart when filled.
4.3. Bottom Fold
Fold the bottom of the tube upwards to create the base of the bag. The height of this fold will determine the depth of the bag.
4.4. Unfold and Shape
Unfold the bottom fold and shape it into a flat base by pressing the corners inward. This creates a rectangular or square bottom for the bag.
4.5. Side Folds
Press the sides of the bag inward along the vertical creases, creating the final shape. This will give the bag its volume and allow it to stand upright.
4.6. Reinforce the Folds
Reinforce all the folds with tape or glue to ensure the bag maintains its shape and can support the weight of the gift.
By following these basic folds, you can create a functional and attractive gift bag from paper.
5. How Do You Create a Sturdy Base for the Paper Gift Bag?
To create a sturdy base for the paper gift bag, fold the bottom of the bag upwards, then unfold and flatten it into a rectangular shape, reinforcing the corners with tape to prevent tearing.
5.1. Fold the Bottom Upward
Fold the bottom edge of the paper gift bag upwards, creating a flap that will form the base. The height of this flap determines the depth of the bag’s base.
5.2. Unfold and Flatten
Unfold the flap and open the bottom of the bag. Flatten the corners inward to create a rectangular or square shape, forming the base of the bag.
5.3. Crease the Folds
Crease the folds along the edges of the rectangular base to give it a defined shape. This will help the base stay flat and sturdy.
5.4. Reinforce with Tape
Apply tape to the inside corners of the base to reinforce them, preventing the paper from tearing or collapsing under the weight of the gift.
5.5. Test the Base
Place the gift bag on a flat surface and test the sturdiness of the base by gently pressing down on it. Ensure the base can support the weight of the gift without buckling.
5.6. Add Additional Support
For heavier items, consider adding a piece of cardboard cut to the size of the base for extra support. This will ensure the bag remains stable and prevents the bottom from sagging.
By following these steps, you can create a sturdy base for your paper gift bag, ensuring it is strong enough to hold the gift securely.
6. How Can You Add Handles to a DIY Paper Gift Bag?
You can add handles to a DIY paper gift bag by punching holes near the top of the bag, threading ribbon or rope through the holes, and knotting the ends securely on the inside.
6.1. Measure and Mark
Measure and mark equal distances from the top edge of the bag where you want the handles to be placed. Use a ruler to ensure the marks are symmetrical.
6.2. Punch Holes
Use a hole punch to create clean holes at the marked spots. Ensure the holes are large enough to accommodate the ribbon or rope you will be using for the handles.
6.3. Thread the Handles
Cut two equal lengths of ribbon or rope for the handles. Thread one end of each length through the holes from the outside of the bag to the inside.
6.4. Secure the Knots
Tie a secure knot at each end of the ribbon or rope on the inside of the bag. Ensure the knots are large enough that they cannot slip back through the holes.
6.5. Reinforce the Holes
For added durability, reinforce the holes with tape or metal eyelets before threading the handles. This will prevent the paper from tearing around the holes.
6.6. Check the Handle Strength
Test the strength of the handles by gently lifting the bag. Ensure the handles are securely attached and can support the weight of the gift.
By following these steps, you can add functional and attractive handles to your DIY paper gift bag, making it easy to carry and adding a professional touch.
7. What Are Some Creative Embellishments for a Paper Gift Bag?
Some creative embellishments for a paper gift bag include adding ribbons, bows, stamps, stickers, hand-drawn designs, glitter, or personalized tags to enhance its appearance.
7.1. Ribbons and Bows
Tie colorful ribbons or create decorative bows to add a festive touch to the gift bag. Choose ribbons that complement the paper’s design and the occasion.
7.2. Stamps
Use decorative stamps to create patterns or images on the bag. You can use themed stamps for holidays, birthdays, or other special events.
7.3. Stickers
Apply stickers with fun designs, messages, or the recipient’s name to personalize the bag. Stickers are an easy way to add a pop of color and creativity.
7.4. Hand-Drawn Designs
Draw your own designs or write a personalized message on the bag using markers or colored pencils. Hand-drawn embellishments add a unique, personal touch.
7.5. Glitter
Add glitter to the bag for a sparkling effect. Use glitter glue or adhesive spray to apply glitter to specific areas or the entire bag.
7.6. Personalized Tags
Create personalized tags with the recipient’s name and a special message. Attach the tag to the handle or ribbon for a thoughtful finishing touch.
By incorporating these creative embellishments, you can transform a simple paper gift bag into a beautifully decorated and personalized presentation.
8. What Types of Paper Work Best for Making Gift Bags?
Types of paper that work best for making gift bags include wrapping paper, kraft paper, cardstock, and decorative paper, as they offer the right balance of thickness, durability, and aesthetic appeal.
8.1. Wrapping Paper
Wrapping paper is a popular choice due to its wide variety of colors and patterns. It is lightweight and easy to fold, making it suitable for small to medium-sized gifts.
8.2. Kraft Paper
Kraft paper is a sturdy and versatile option that provides a rustic, natural look. It is durable and can hold heavier items, making it ideal for larger gifts.
8.3. Cardstock
Cardstock is a thicker paper that offers excellent durability and structure. It is perfect for creating high-quality gift bags that need to withstand more weight.
8.4. Decorative Paper
Decorative paper, such as scrapbook paper or origami paper, comes in various designs and textures. It is ideal for adding a unique and stylish touch to your gift bags.
8.5. Recycled Paper
Using recycled paper is an eco-friendly option that reduces waste and promotes sustainability. Recycled paper comes in different weights and finishes, suitable for various gift bag designs.
8.6. Tissue Paper
While tissue paper is too thin to be used alone, it can be layered with other types of paper to add color and texture. It is perfect for lining the inside of the gift bag.
By selecting the right type of paper, you can ensure that your gift bag is not only visually appealing but also strong enough to hold the gift securely.
9. How Do You Customize the Size of a Paper Gift Bag?
You can customize the size of a paper gift bag by adjusting the initial dimensions of the paper sheet, altering the depth of the bottom fold, and modifying the width of the side folds to fit the specific gift.
9.1. Measure the Gift
Measure the dimensions of the gift to determine the desired size of the gift bag. Consider the height, width, and depth of the item.
9.2. Adjust Paper Dimensions
Cut the paper sheet to the appropriate size, adding extra inches for the folds. The height of the paper will determine the height of the bag, while the width will determine the bag’s width and depth.
9.3. Modify Bottom Fold
Adjust the depth of the bottom fold to create a wider or narrower base. A deeper fold will result in a larger base, while a shallower fold will create a smaller base.
9.4. Alter Side Folds
Modify the width of the side folds to change the overall width of the bag. Wider side folds will create a wider bag, while narrower folds will result in a slimmer bag.
9.5. Test the Size
Fold the paper according to the desired dimensions and test the size by placing the gift inside the bag. Make any necessary adjustments to ensure the gift fits comfortably.
9.6. Finalize the Folds
Once you are satisfied with the size, finalize the folds and secure them with tape or glue. Reinforce the bottom and sides of the bag to ensure it can support the weight of the gift.
By customizing the size of the paper gift bag, you can create a perfectly fitted and personalized presentation that enhances the overall gifting experience.
10. What Are Some Tips for Making a Professional-Looking Paper Gift Bag?
Tips for making a professional-looking paper gift bag include using high-quality paper, making precise folds, securing edges neatly, adding decorative elements thoughtfully, and reinforcing stress points.
10.1. Use High-Quality Paper
Choose premium wrapping paper, cardstock, or decorative paper to ensure a polished look and feel. High-quality paper is more durable and enhances the overall presentation.
10.2. Make Precise Folds
Use a ruler and bone folder to create crisp, clean folds. Precise folds ensure the bag has a professional appearance and maintains its shape.
10.3. Secure Edges Neatly
Use double-sided tape or clear tape to secure the edges of the bag. Ensure the tape is hidden and the edges are neatly aligned for a seamless finish.
10.4. Add Decorative Elements Thoughtfully
Choose embellishments that complement the paper’s design and the occasion. Avoid overcrowding the bag with too many decorations.
10.5. Reinforce Stress Points
Reinforce the bottom and handle attachments with extra tape or glue. This ensures the bag can support the weight of the gift without tearing.
10.6. Personalize with Care
Add a personalized tag, handwritten note, or custom sticker to show attention to detail. Thoughtful personalization enhances the recipient’s experience.
10.7. Smooth Out Wrinkles
Iron the paper lightly before folding to remove any wrinkles or creases. This ensures the bag has a smooth, professional finish.
By following these tips, you can create a paper gift bag that looks professionally made and adds a special touch to your gift presentation.
FAQ: How to Fold Paper Into a Gift Bag
1. What is the best type of paper to use for folding a gift bag?
The best paper for folding a gift bag is sturdy wrapping paper or kraft paper, as it is durable enough to hold the gift without tearing and provides a neat finish.
2. How do I make the bottom of the gift bag sturdy?
To make the bottom sturdy, fold the bottom of the bag upwards, unfold and flatten it into a rectangular shape, and reinforce the corners with tape.
3. How can I add handles to my paper gift bag?
Add handles by punching holes near the top of the bag, threading ribbon or rope through the holes, and knotting the ends securely on the inside.
4. What are some creative ways to decorate a paper gift bag?
Creative decorations include adding ribbons, bows, stamps, stickers, hand-drawn designs, glitter, and personalized tags to enhance the bag’s appearance.
5. Can I customize the size of my paper gift bag?
Yes, you can customize the size by adjusting the initial dimensions of the paper sheet, altering the depth of the bottom fold, and modifying the width of the side folds.
6. What tools do I need to fold a paper gift bag?
You will need wrapping paper, scissors, tape, a ruler, a pencil, hole punch, and ribbon to complete your personalized gift bag.
7. How do I ensure the folds are precise and neat?
Use a ruler and bone folder to create crisp, clean folds, ensuring the bag has a professional appearance and maintains its shape.
8. What can I do to reinforce the handles of the gift bag?
Reinforce the handles by using sturdy ribbon or rope, tying secure knots on the inside, and adding tape or metal eyelets around the holes.
9. Is it more cost-effective to make my own gift bags?
Yes, making your own gift bags can be more cost-effective, especially if you have wrapping paper or decorative paper on hand, saving money on store-bought options.
10. How can I make my paper gift bag eco-friendly?
Make your gift bag eco-friendly by using recycled paper or wrapping paper, reducing waste and promoting sustainability.
Make Your Gifts Extra Special with LawyerGift.com
Ready to add a personal touch to your gifts? At lawyergift.com, we understand the importance of presentation. Don’t settle for generic gift bags when you can create something unique and memorable.
Are you struggling to find the perfect gift for the lawyer in your life? Look no further than lawyergift.com. We offer a wide selection of unique and thoughtful gifts tailored specifically for legal professionals. Whether it’s for a birthday, graduation, or just to show your appreciation, we have something for every occasion.
Ready to Find the Perfect Gift?
- Explore Our Categories: Browse our curated collections for lawyers to find the ideal present.
- Search by Occasion: Discover gifts perfect for birthdays, graduations, and more.
- Contact Us: Need help? Our team is here to assist you in finding the perfect gift.
Visit lawyergift.com today and make your gift truly unforgettable.
Address: 3210 Wisconsin Ave NW, Washington, DC 20016, United States
Phone: +1 (202) 624-2500
Website: lawyergift.com