
The holiday season is the perfect time to add a personal touch to your gift-giving. As a content creator from lawyergift.net, I’m excited to share a delightful DIY project that will elevate your Christmas presents: handcrafted Christmas Boxes For Gifts. Inspired by the Spellbinders Sealed 3D Christmas Collection, this tutorial will guide you through creating charming, ombré gift boxes that are perfect for candies, baked goods, or small treasures.
These adorable Christmas boxes for gifts are not only visually appealing but also a heartfelt way to show your loved ones you care. Imagine presenting homemade cookies or festive chocolates in these beautifully crafted containers! Let’s dive into how you can create your own set of these festive boxes.
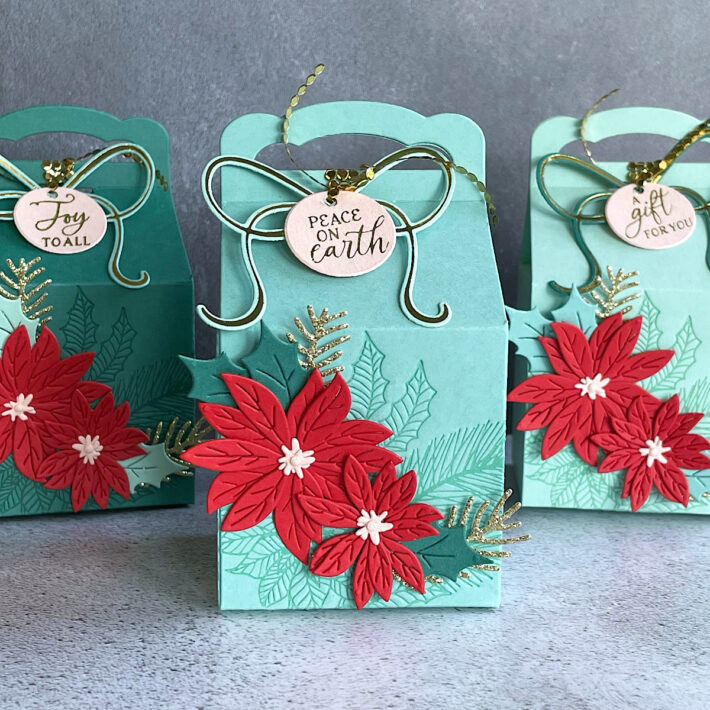 Ombré Christmas gift boxes in Poppy, Nectar, Sea Glass, Tidepool, and Juniper colors, decorated with poinsettias and ribbons.
Materials You’ll Need to Create Your Christmas Boxes for Gifts
To embark on this creative journey of making Christmas boxes for gifts, gather these supplies, primarily from the Spellbinders Sealed 3D Christmas Collection and a few other essential crafting tools:
- Etched Dies:
- Ribbon Box Etched Dies from the Sealed 3D Christmas Collection – The star of our project, these dies create the box structure.
- Holiday Blooms Etched Dies from the Celebrate the Season Collection – For crafting poinsettias and holly leaves to adorn your boxes.
- Bouquet Full of Joy Glimmer Hot Foil Kit of the Month Plates Only – Specifically for the bow embellishments.
- Press Plate & Die Set:
- Sealed Poinsettia Stems Press Plate & Die Set from the Sealed 3D Christmas Collection – To add intricate poinsettia stem details and festive sentiments.
- Hot Foil:
- Glimmer Hot Foil Roll – Gold – For elegant gold accents and sentiment foiling.
- Cardstock & Ink:
- Cardstock in Poppy, Nectar, Sea Glass, Tidepool, and Juniper colors – To create an ombré effect for your Christmas boxes for gifts.
- Gold glitter paper – For adding sparkle to evergreen sprigs.
- Coordinating Inks (Sea Glass, Tidepool, and Juniper) – To enhance the sealed poinsettia stem design.
- Embellishments & Tools:
- Vivant Circle Gold Metallic Cord – For tying and adding a luxurious touch to your boxes.
- Mini glue dots – For adhering embellishments securely.
- 1/8” circle punch – To create a hole for the ribbon on sentiment tags.
Step-by-Step Guide to Crafting Your Christmas Boxes for Gifts
Follow these detailed steps to assemble your own set of charming Christmas boxes for gifts:
1. Die-Cutting the Ribbon Boxes
Begin by die-cutting the Ribbon Box from cardstock in Tidepool, Juniper, and Sea Glass colors. This will form the base of your ombré set of Christmas boxes for gifts. Cut out multiple boxes if you plan to create a larger set.
2. Adding Sealed Poinsettia Details
Using coordinating inks (Sea Glass, Tidepool, and Juniper), press the Sealed Poinsettia Stems onto one side panel of each box before assembling. This adds a beautiful, textured design element to your Christmas boxes for gifts, making them even more special.
 Close-up of die-cut pieces for Christmas boxes, including ribbon box shapes and poinsettia embellishments.
3. Creating Poinsettias and Holly Embellishments
Die-cut poinsettias, holly leaves, and gold glitter evergreen sprigs using the Holiday Blooms dies. Utilize Poppy and Nectar cardstock for vibrant poinsettias. Cut holly leaves from the same cardstock colors as the boxes (Tidepool, Juniper, and Sea Glass), rotating the colors for visual contrast across your Christmas boxes for gifts.
4. Heat Foiling Sentiments
Heat foil the round sentiments from the Sealed Poinsettia Stems set in Gold Hot Foil onto Nectar cardstock. These sentiments will become elegant tags for your Christmas boxes for gifts. Use the coordinating circle die to cut out the sentiments, leaving a bit of extra space at the top for ribbon attachment. Punch a 1/8” hole at the top of each tag.
 Gold foiled sentiment tags for Christmas gift boxes, featuring festive holiday messages.
5. Assembling the Boxes and Adding Ribbon
Assemble the die-cut Ribbon Boxes. Cut lengths of Vivant Circle Gold Metallic Cord. Loop the cord around the handle of each box three times, then attach a sentiment tag by threading the cord through the punched hole. Tie off the cord to secure the tag and add a decorative element to your Christmas boxes for gifts.
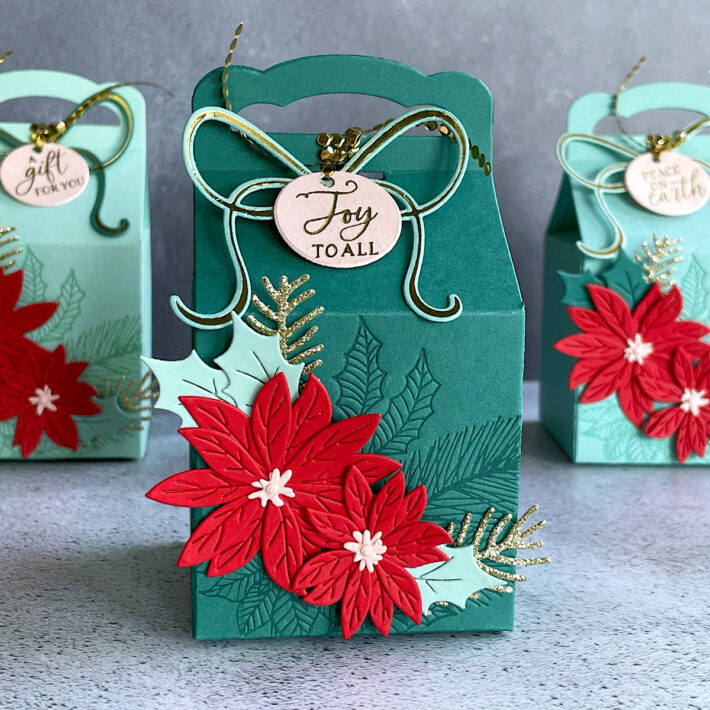 Assembled Christmas gift box with gold ribbon and a sentiment tag attached.
6. Adding Bow Embellishments
For an extra touch of elegance, heat foil bows from the Bouquet Full of Joy set in Gold Hot Foil onto cardstock matching the box and holly leaf colors. Again, rotate the colors to ensure each color (Sea Glass, Tidepool, and Juniper) is represented on each box. Attach these beautiful bows to your Christmas boxes for gifts using mini glue dots.
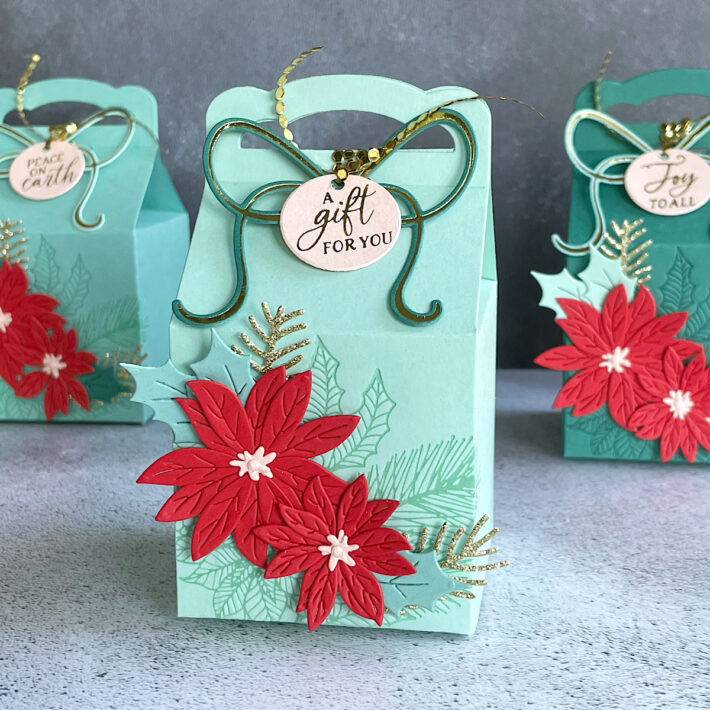
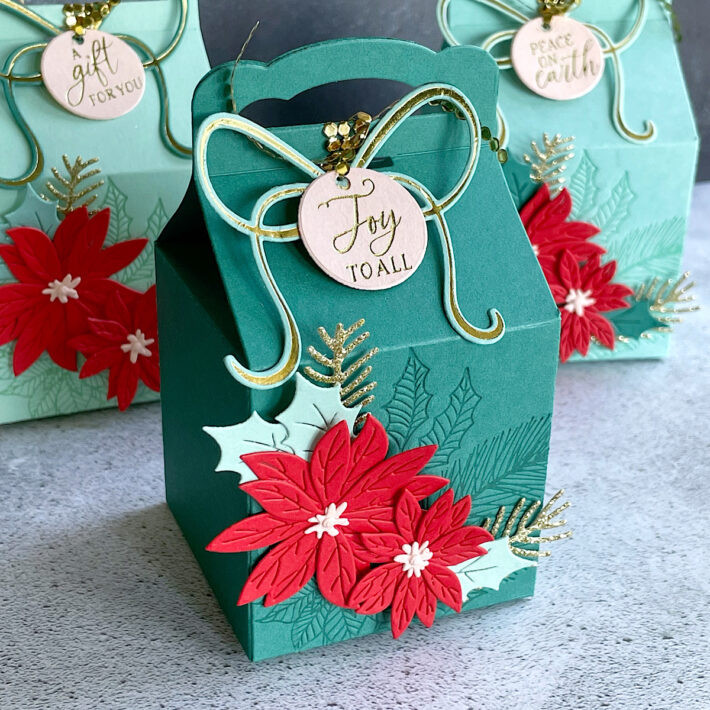 Finished Christmas gift boxes with bows, ribbons, and poinsettia decorations, showcasing the complete ombré set.
Personalizing Your Christmas Boxes for Gifts
Feel free to customize these Christmas boxes for gifts to your liking! Experiment with different color combinations for the ombré effect, or try using patterned cardstock for a unique look. You can also embellish further with glitter, sequins, or other festive decorations. Consider adding names to the sentiment tags to personalize each box for its recipient.
Conclusion: Spread Holiday Cheer with Handmade Christmas Boxes for Gifts
Creating these Christmas boxes for gifts is a rewarding way to personalize your holiday gifting. Using the Spellbinders Sealed 3D Christmas Collection, you can easily craft a set of elegant and festive boxes that are sure to impress. Whether you fill them with homemade treats or small gifts, these handmade boxes add an extra layer of thoughtfulness to your presents. Start crafting your own Christmas boxes for gifts and bring a handmade touch to your holiday celebrations!
Spellbinders Supplies:
Other Supplies
Poppy, nectar, sea glass, tide pool and juniper cardstock; gold glitter paper; sea glass, tide pool and juniper ink; mini glue dots; 1/8” circle punch