Looking for a unique and personal touch to elevate your gift wrapping? Tired of generic store-bought ribbons? This year, I decided to get creative and resourceful with my gift presentation, especially since a quick trip to the shops isn’t always an option. With a roll of brown paper and a stash of yarn, I embarked on a mission to make my gifts stand out, without looking like I was just trying to use up old supplies! That’s when the idea of Gift Wrap Ribbon using crochet came to mind.
Having dabbled in crochet before, I had plenty of wool yarn lying around. Simply using yarn as ribbon felt a bit underwhelming. It needed more substance, more flair. The solution? Crocheting a gift wrap ribbon!
Surprisingly, crocheting a gift wrap ribbon is a quick and rewarding project. It’s also a fantastic way to use up yarn scraps. If you’re looking to add a handmade, charming touch to your presents this year, follow these 3 easy steps to create your own beautiful gift wrap ribbon.
 DIY GIFT | Crochet Gift Wrap Ribbon – Threadbare Cloak
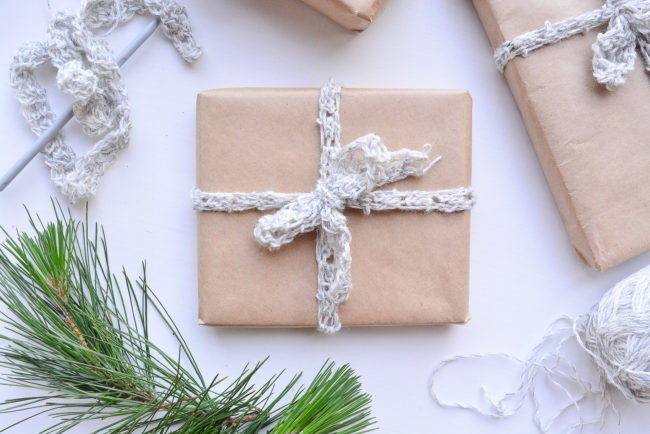
A close up showcasing the texture and detail of a handmade crochet gift wrap ribbon in a cream color, tied elegantly around a gift wrapped in simple brown paper, creating a rustic and personalized aesthetic.
What you’ll need:
- Wool yarn (in your choice of color)
- Crochet hook (size 5 is recommended, but adjust based on your yarn weight)
Step 1| Foundation chain
First, you’ll need to create a slip knot and then a foundation chain.
The slip knot is essentially the starting loop on your hook that anchors the yarn.
The foundation chain is the base row of stitches that all crochet projects begin with. For a gift wrap ribbon, you only need a narrow width, so a chain of 2 or 3 stitches is perfect. This keeps your ribbon delicate and manageable for wrapping.
For visual learners, Crochet Guru offers excellent video tutorials on creating a Slip Knot and a Foundation Chain. They break down the process clearly and are a great resource if you’re new to crochet or need a refresher.
Step 2| Start crocheting
For this crochet ribbon, the double crochet stitch is used. It’s a versatile stitch and creates a lovely textured ribbon. If you’re familiar with other crochet stitches, feel free to experiment! The key is to maintain a width of just 2 or 3 stitches.
If you are new to the double crochet stitch, Crochet Guru’s Double Crochet Tutorial is a helpful guide. They also have tutorials for many other stitches if you wish to explore different textures and patterns for your gift wrap ribbon.
To determine the length of your gift wrap ribbon, simply wrap it around your gift as you crochet. Make sure to leave enough extra length at each end to tie a beautiful bow. Once you’ve reached the desired length, cut the yarn, leaving a tail of about 10-15cm. Loop this tail through the last stitch and knot it securely to finish off your ribbon. Trim any excess yarn.
Step 3| Wrap the gifts
Now for the enjoyable part – wrapping your presents with your handmade gift wrap ribbon!
Wrap your gifts in your chosen wrapping paper. Brown paper creates a lovely rustic look that complements the crochet ribbon beautifully, but feel free to use any paper you like. Then, wrap your crochet ribbon around the package and tie it securely with a bow. Adjust the ribbon to ensure it is positioned symmetrically and enhances the overall presentation of your gift.
And that’s it! Your handmade crochet gift wrap ribbon is complete, adding a personal and eco-friendly touch to your gifts. Next step? The joy of giving and seeing the smiles on your loved ones’ faces!
 DIY GIFT | Crochet Gift Wrap Ribbon – Threadbare Cloak
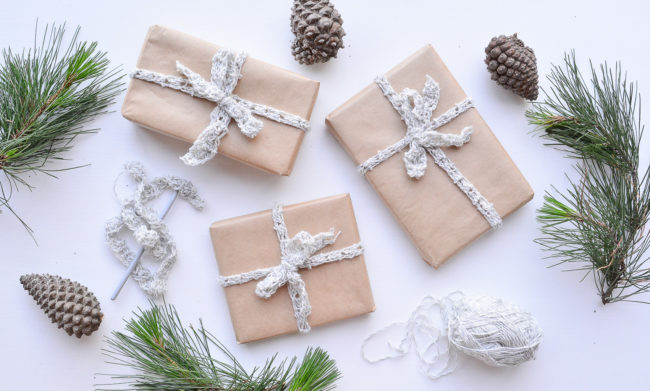
An overhead shot showcasing a beautifully wrapped gift using brown paper and a crocheted cream colored gift wrap ribbon, tied in a neat bow, highlighting the simple elegance and handmade charm of the gift presentation.